Showing posts with label tips. Show all posts

Wednesday, March 27, 2013

Ten Reasons to Take a Cloth Napkin (Hen House Linens Product Review)

Full Disclosure:  
I received a set of dinner napkins
from Hen House Linens (& I love them)!

How many of you grab a couple of extra napkins every time you're at your favorite coffee house?  I've definitely been guilty of that one, but let's stop to think about it.  There are numerous environmental reasons that using cloth napkins is preferable to paper ones.  Aside from saving trees, you're also saving water used in the manufacture of paper napkins. 

Truthfully, there is a reason that paper napkins are so ubiquitous.  They are convenient, useful, and you can easily just throw them away.  However unfortunately, they don't really go away. According to Organic Authority, landfills are stuffed with 3,000 tons of paper tissue products daily. This produces harmful greenhouse gasses.   
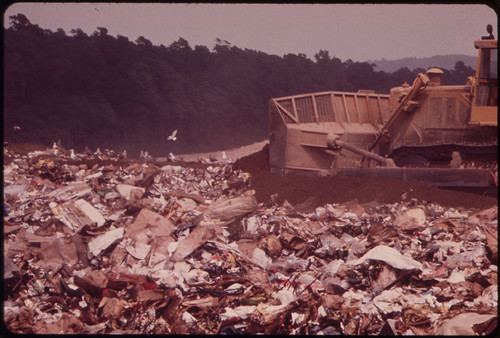
Source: US National Archives, Wil Blanche, 1973 via Flickr Commons
 A 1970's landfill.  Yuck.

And think about it, isn't it kind of charming to pull a brightly-colored, soft cloth napkin out of your pocket rather than grabbing for that dull, brown paper one?


Sunday, August 19, 2012

L.A, #Crochet, & Mommy Tips

Jennie & me before the wedding
 I am so lucky because I was able to take a moment out of my real life to quickly jaunt over to L.A. to see my dear friend Jennie get married to her longtime beau, Larry.  They both looked stunning at the ceremony and we all had a great time at the fun party!

Tuesday, January 4, 2011

How I Made Scratchy Yarn Like Buttah


Image Source - google images
Recently I made a great scarf. I had my dad try it on and he told me he didn't like how it felt on his neck.  Boo!  I can't say I'm surprised, because the yarns I used were Red Heart Super Saver, Lion Brand Fisherman's Wool, and a really rough, straight from the sheep wool I picked up in Oaxaca.

I'm not dissing on any of these yarns.  I adore them all, but let's be honest- they don't have the best reputations for being squooshy and buttery to the touch.

So let me tell you (step by step) what I did to make my scratchy scarf buttery smooth. Saturday Night Live character Linda Richman would say, "Like buttah."   

Get Crafty Updates from Art, Like Bread in Your Inbox!

* indicates required


Thanks to Leslie on Crochetbug for the Red Heart in vinegar tip!

1.  Soak the scarf for 20 min in a cold vinegar solution.  (Ratio of 1:64, vinegar to water should do.)

2.  Rinse

3.  Hand wash in cold water with shampoo. Do not agitate.

4.  Rinse twice

5.  Gently massage in a generous amount of hair conditioner into each part until it is saturated.

6.  Let sit 10 min.

7.  Soak saturated scarf in cold water for at least an hour. 

8.  Rinse twice.

9.  Gently get rid of excess water by lightly squeezing, and rolling in a towel.

10. Block garment by laying flat to dry.

I used cheap Suave shampoo and conditioner for this, and not only is my scarf like buttah, it also smells like apples.

Saturday, December 25, 2010

Last-Minute Gift Solutions!

Sometimes even when you don't procrastinate, you can't find the Christmas gifts you so lovingly chose and carefully hid.  So you just have to improvise.

At least it's pretty, right?
And sometimes you just want to spoil your family and not clutter their homes with chachkes.

relaaaaaax... Zzzzzzzz


And yet, during these times, you might have misplaced (some of) your normal craft supplies and, well, these were lying around.

CHEEEEAP cell phone cover & SHARP scissors!
(I don't remember the *exact* cost of the cell phone rhinestones, but I am pretty sure I got them at the dollar store.)

Quick tutorial/tip!  Go out a buy a cheap rhinestone cell phone cover, and use your tiniest, sharpest scissors to cut strips of rhinestones.  While cutting, keep the clear backing on the sticker, and make sure that some of it is protruding out at the end of the line of rhinestones, so you can remove the stones from the backing.  While applying the rhinestones, do not let your fingers touch the backing.  To isolate an individual rhinestone, peel back the edge of the plastic backing, let the rhinestone touch your paper, and carefully snip the rest of the line of rhinestones away.  You can reposition the rhinestone by using your scissors to grasp the sides of it before you press it down.

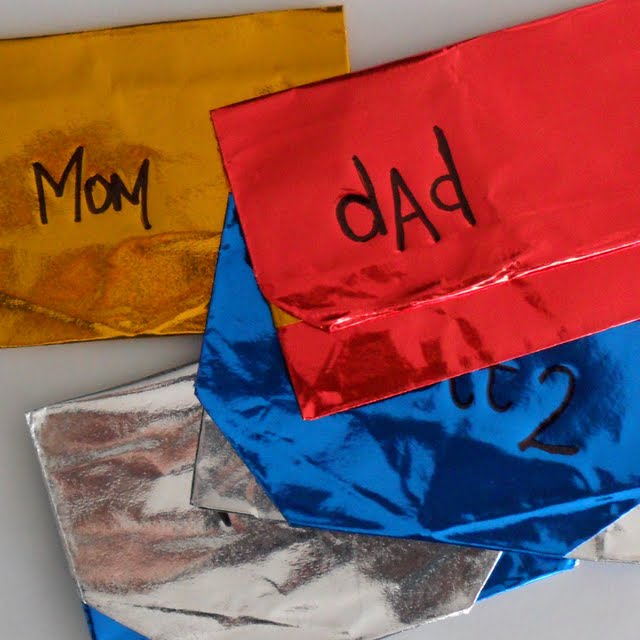
And because these gifts are kind of small, you just have to break out the origami book to make them a bit more special.

These held the frozen yogurt giftcards.
It's reusable!
If you're interested in an origami book with simple instructions, you can get the one I have here.  It's called Origami: Easy-to-Make Paper Creations by Gay Merrill Gross.  I highly recommend it!

Thursday, October 21, 2010

Make Your Own Glue Dots!

I thought this was so clever, I had to share it as a quick tip!  Duncan's I Love to Create blog posted a video on how to make glue dots from Aleene's Tack It Over and Over glue.  I actually have some of this glue, so I'll give it a try next time I need glue dots.  What an affordable alternative to normal glue dots!  Great job, Pattie!
Sunday, May 25, 2008

Safe Sparkle Methods with the Crafty Chica

I'm a daily reader of the Crafty Chica's myspace blog. A while ago, she began a campaign to help favorite talk show host, Ellen DeGeneres, to understand glitter. Ellen had declared that she doesn't like glitter because it gets everywhere. What Ellen doesn't know about are safe sparkle methods.

The Crafty Chica has made it her mission to educate Ellen on the finer points of safe sparkle. This video says it all.

Sunday, February 24, 2008

Cuttlebug Tips

I wanted to do this post for my own info. I just got a cuttlebug machine and I'm excited because I can use it with every different die cut system! :o)

Christine from Scraptime did a few videos about using the cuttlebug, so I decided to repost her recipes here.

So far, I have cuttlebug dies (which rock!), and I just got the scalloped quickcuts. I also have an order of sizzlits coming in. yay!

---reposted from www.scraptime.ca---

For Quickutz - use ‘A’, cutting mat ‘B’, the die, paper and cutting mat ‘C’

For Quickutz Cookie Cutters - use ‘A’, Sticky mat, paper, Quickutz cutting mat and cutting mat ‘C’

For Sizzix Embosslits - use ‘A’, cutting mat ‘B’, die with paper in middle and cutting mat ‘B’

For Spellbinders (to cut) - Use ‘A’, cutting mat ‘B’, die, paper and cutting mat ‘C”

For Spellbinders (to emboss) - take off cutting mat ‘C’, add on tan and black Spellbinder embossing mats and add on cutting mat ‘B’

Wednesday, January 2, 2008

Tips: Thank You Notes & Glitter Application

Okay, so I overmade my holiday cards this year. I had 130 people on my list, but not that many sent me their addresses. So now I've got pre-cut Christmas shapes. Since I'm still in the mood, I don't want to leave them alone until next year. By then they'll seem old anyway! So I'm going to use my holiday cards (especially those that don't say "Merry Christmas" or "Happy Holidays") as thank you notes for my gifts. What a perfect solution!

A particularly brilliant customer at my craft store gave me this tip for precise glitter application, and I had to share. To get the glitter just where you want it and nowhere else, simply clip a drinking straw on an angle to create a tiny "scoop" for your glitter. Sprinkle on sparingly and you're good to go. Very little excess is expended and therefore cleanup is easier, too! This is especially helpful for those tiny glitter viles that make it seem impossible to put the glitter back in.

Ugh. Off to "resume." I'd rather be crafting! (That'd make a great bumper sticker...)