Showing posts with label environment. Show all posts

Sunday, September 25, 2011

Christmas Crafts! Make a Yarn Card with Martha

Oh, Martha! You've done it again! 

While gleefully clicking around the internet on a recent day off (yeah!), I found this great video of the original craft idol Martha Stewart teaching how to make yarn cards.  What a great use for your yarn scraps! And it's just in time for Christmas card-making. There are only 3 months of making left!


Martha has all-occasion templates for this craft available on her website, but I'm thinking about this:
  1. Using a cup, trace a circle onto the front of your card.
  2. Draw a little rectangle onto the top of the circle.
  3. Using Martha's techniques, "color" your ornament with yarn. :)
  4. Be creative! Embellish with glitter, craft markers, and scraps of paper.
Ooo, this sounds so fun, I can't WAIT to make some cards!!

Monday, May 16, 2011

Suzanne Lee: Grow your own clothes (TED Talk)

I love podcasts!  I always learn such interesting things. I love that they are audio, so I can learn while I am doing something else, like, oh, crocheting! :)

I came across this TED talk yesterday and I had to post it today.  It was that cool.  It combines science, the environment, design, and fashion.  Could it get any better?

Sunday, May 15, 2011

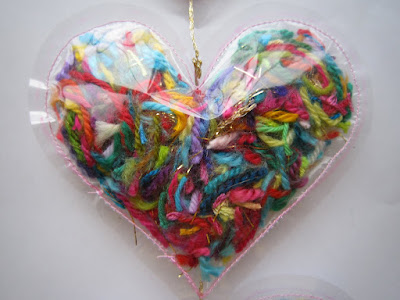
Project Link: Scrap Hearts by Elizabeth Cat

I spend so much time in the crafty crochet blogosphere, I don't usually remember how I found this idea or that.  However, I did make note of the source of this incredible find.  Sarah's Sweethearts is a fun fiber blog with a classic, vintage sensibility. 

It was through her sidebar that I found the incredible blog entitled By Elizabeth Cat.  Full of colorful, inspirational photo collages and tasteful crafts, the blog quickly became a favorite!  When I saw this project, I knew I wanted to blog it!

Photo used with permission of Elizabeth Cat | All Rights Reserved
Yarn crafters spend hours selecting yarn and working on projects.  Over that time the yarn becomes a part of your memory.  You may keep the project or you may give it away, but once the yarn is gone, it's gone.  Artisan yarns are dyed in lots, and you may never get that exact color and fiber combination ever again.  In addition, we don't like wasting things, and I think almost every yarn crafter has a "scrap jar" or some other such receptacle in which to store the little ends snipped after they are lovingly woven into the finished object.

Of course that begs the question, "What can one do with these pretty scraps?"  That all depends upon their length, but Elizabeth has come up with a completely original way to display these ends and decorate simultaneously.

What a beautiful way to ornament your home while remembering your previous projects!  There are more shapes, directions, and display ideas on Elizabeth's blog.  I could even see these used as gift toppers, or made in color families for a different effect.

Definitely check Elizabeth Cat out for some amazing crochet eye-candy as well. I always do!

    Monday, September 6, 2010

    Free Project: Big-Ol' Gift Bag

    Let's face it.  Christmastime can get really busy.  The stores are packed, and it's not always that easy to find the perfect wrapping for your presents.  And well, at the last minute, you might find that you need a gift bag.  Kinda soon.  I love this project because it lets me avoid ridiculousness that is retail shopping during the holidays.

    So here's a quick little craft that uses what you probably already have on hand.  I loved doing this craft, and I hope you do, too.
    That's the front...
     Big-Ol' Gift Bag
    What you need*:  Trader Joe's (or other similar) paper bag with handles, acrylic paint (red), foam brush, squeezable fabric paint (green & white), bubble wrap, paper plate, scrap paper.
    *The project can be adapted to other themes by using other paint colors & motifs.  I'm just letting you know exactly what I did.

    What to do:
    1. Using red acrylic paint & foam brush, paint over the store logo in the shape of a circle.  Let dry.
    2. Using green, squeezable fabric paint, accent the red circle to look like a Christmas ornament.  I drew a rectangle on top of the circle, and made a few curved, zig-zag, and squiggly lines on the circle part.  Let dry.
    3. Squeeze some white fabric paint onto a paper plate or other surface.  Dab bubble wrap into the paint and test the impression on your scrap paper.  When you are happy with the impression, use the bubble wrap to apply the white paint to the gift bag in a random pattern.  The idea is that it will look like snow falling.  Let dry.
    4. (Optional) Write your holiday greeting in green, squeezable fabric paint.  Let dry.
    5. Repeat steps 1-3 on the other side of the bag.
    6. If applicable, cover logos on the sides of the bag with red acrylic paint.
    And that's the back.
    Enjoy!

    Wednesday, August 4, 2010

    In a Pinch Hangtags Tutorial

    Want to have a better than average garage sale?  Well, I did and I knew that the regular price tags wouldn’t do on the pretty handbags and other items I had for sale.  I was going to buy the hangtags, but honestly, after searching at two stores, I just didn’t have more time to go out there and get them.  When I figured it out, I realized that I could make a bunch of eco-friendly hangtags in just a few minutes.

    The concept for this project is incredibly simple.  If you think another material can be substituted, IT CAN! 

    Materials
    • Some old packaging (like a cereal box) with at least one side free for writing
    • A pin or a pushpin
    • A tapestry needle
    • Some string or heavy thread
    • Scissors
    Procedure
    1.       Cut up the box in any size or shape you want.  I opted for tags large enough to hold a description and price.


    2.       Using the pin, poke a hole in the top of each tag.

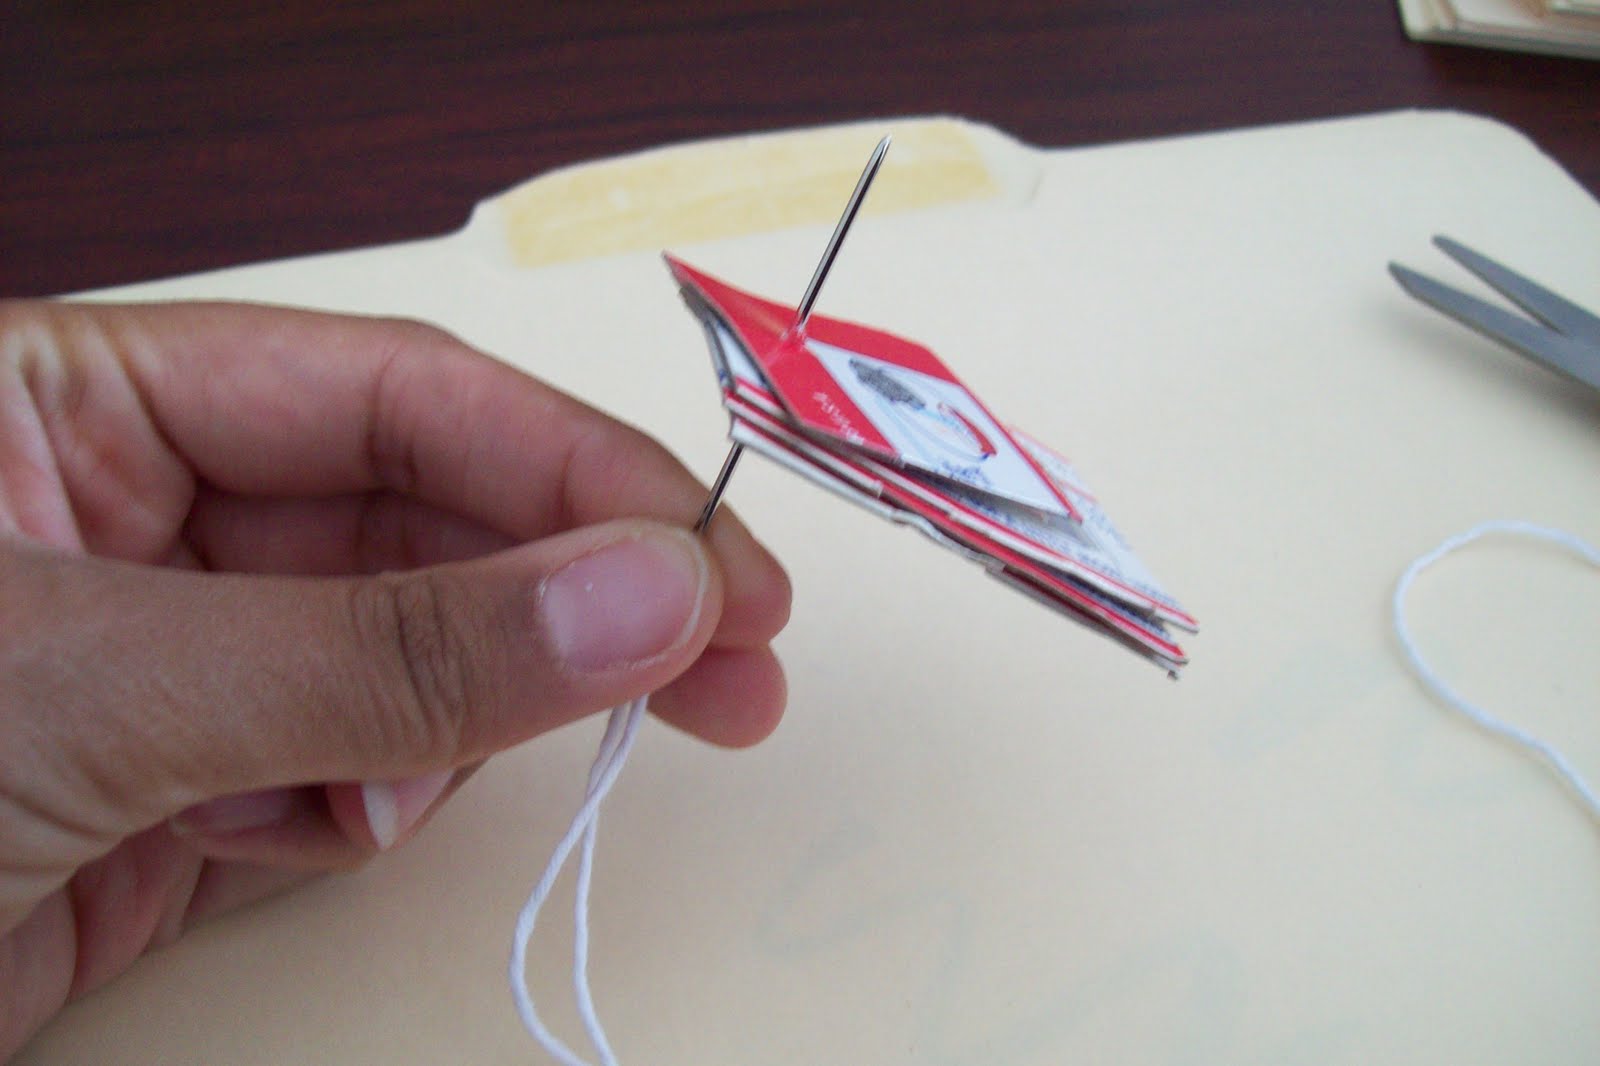
    3.       Thread the tapestry needle with the string.  Keep the string attached to the spool or ball.
    4.       Line up all of your tags onto the tapestry needle.

    5.       Ease the tags onto the string.  You can line up as many of these as you want.
     
    6.       With one tag pulled out about 4" from the end of the string, measure out a length of string that seems about the right length for a hangtag.
    7.       Snip the string for that tag.
    8.       Tie a knot at the top.
    Now your tags are ready for use!

     I know this project is pretty elementary, but seriously, how much do those hangtags cost?  If you’re going out only for those, you’re going to waste a lot of time and money.  It takes only a few minutes to make these.  It’s a quick and useful craft.  It can also be modified into beautiful gift tags.

    Wednesday, July 14, 2010

    FUSION! Marta Carmela


    I was so tempted to use this image as my blog header. The necklaces crafted by Marta Carmela are made from recycled t-shirts and wrapped with string until they resemble something truly stunning. As you can tell, I doctored the image quite a bit, but the essence of the necklaces comes through beautifully.

    These are made from recycled jeans.

    Her crocheted wire forms are structured yet soft. I'd seen them before in a boutique and marveled at the simplicity & complexity. The idea of using fine wire to crochet a permeable egg shape speaks to the strength of that which is feminine. Perhaps it's the duality that attracts me to them. I adore this designer.


    Rings.

    I saw a woman wearing the one of these necklaces and chased her through the fair to ask her where she got it. They look STUNNING on!

    You can visit Marta Carmela online to learn about these and her other artistic works. Her items can be purchased at Habito on Masaryk in Polanco.

    Thank you for joining me on my tour through Fusion Bazaar. I hope you've been as inspired by these local artisans as I have.

    Friday, July 2, 2010

    FUSION! Marca Reciclada Bags & Wallets

    I wanted to share these hip and undeniably Mexican vinyl bags and wallets. They're made by MARCA RECICLADA, a new business that was founded on the concept of using recycled, durable materials. They are advancing the enviro-culture, and their wares can be found in stores all over the city. Visit their website for more information on purchasing.

    This one is like a design ad cross-stitch pattern in one.

    The beloved Angel of Mexico City. I love this.


    Take your pick.

    Sunday, May 16, 2010

    Earth-Friendly Crafting

    I'm gradually giving my blog a facelift. I'd love to do more with it. I don't have the illustrator or photoshop skills... yet. I found this great free embroidery pattern by Mollie Johanson on flickr, and I knew that it had to become my new logo for earth-friendly crafting sites.

    Just click on the picture in my sidebar to be redirected to a delicious page including earth-friendly crafting websites, project ideas, opportunities, and tutorials.

    Enjoy!

    Thursday, May 7, 2009

    Polluter No More!

    Are you sick of that old car sitting on your lawn, just taking up space?

    photo by http://www.ethancrenson.com/images/eeaa03.jpg

    I mean, it's never going to run again. Tow trucks just cost too much.
    Why not do what the artists from Farm Lab at Santa Monica's Bergamot Station did?

    Turn that old car into a planter!
    (Yes, they are artists, but not the artists!)


    Think about it... It's the perfect way to turn a huge,
    gas-guzzling pollution machine into a friend to the environment.

    Be greeted by greenery instead of gas fumes!


    Shotgun!

    This gives me an idea... take it a step further and grow edible plants in your car!

    Driver-side foliage

    It's a sun roof and a rain roof now.

    A trunkful of goodness.

    Although it was the first time I saw a car planter, apparently someone else had the same idea... Here's a similar post from Apartment Therapy. Trend? Learn more about the "Junker Garden" project at Farm Lab.

    Tuesday, May 10, 2005

    Earth-Friendly Crafting and Tips

    This is a live feed of my 250 most recent bookmarks containing environmental tips and crafting ideas.  It was posted on May 10, 2011.