Welcome to Crafting by the Pool
with Cami from Artlikebread.com
It's so exciting! I applied for and was chosen to participate on the Crafty Chica Design Team! The purpose of this post is to show you how I used one of her cool, new, Dia de los Muertos-themed products in an original DIY project. Before we begin, take a look at this fun video where I show you all the materials I used!And don't worry. In case you're viewing this on a mobile device or don't feel like watching the video, I'll do a play by play right here with still pictures.
HERE WE GO!
 |
| Oh yeah! |
Click here to see if a Michaels store in your area is carrying the Crafty Chica line. I went to my local Michaels while preparing for this post and I saw the line! There may be more of these market bags in my future...
(Please note: I tend to mention product brands a lot,
because I appreciate that in other blog posts.
I like to know my products! This goes without saying, but
I like to know my products! This goes without saying, but
feel free to sub any materials you have on hand
to decorate your Crafty Chica Market Tote!)
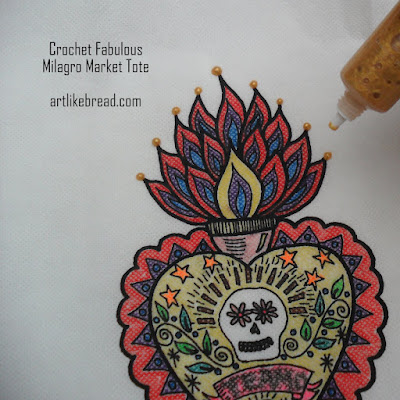
Step 1: Color! It really is that simple. As I colored, I recalled my first grade teacher and picking up tips from my friends and my sister on how to color well. I just followed my heart and colored step by step. Putting color on fabric in this manner is not a usual activity for me, but I thoroughly enjoyed it!
In order to gather the bag evenly, I used the Wescott Trimmer to measure 5-6 inches or so across the bottom. I pulled the stitches, and poked the needle-end of the thread into the inside of the bag so that I could tie the long tails inside of the bag, making a firm knot. The knot stays on the inside of the bag.
- Next I did a single crochet in the same stitch (by stitch, I mean the black yarn you see up there.)
- Next I chained 4 and single crocheted into the next stitch on the other side of the bag.
- In this manner I continued (sc, ch 4, sc into next stitch on other side of tote) until I reached the end of the bag.
- Next, using the larger hook, I chained 3, turned, and worked 3 dc into each ch 4 sp across the bag.
- I then fastened off, broke the yarn, and wove in the ends.
Please note: You could add ANY crochet border to your bag! This is just what worked for me!
Step 4: Add Milagros. To accomplish this, I took about a 12" length of the red Lion Brand Bonbons, and separated the 4-ply yarn into two plies. I did this twice. Next, I threaded the red string through the holes in the milagros. I infused each milagro with happy, empowering, positive feelings!
I then stitched the milagros to the bag and wove in the ends. But I wasn't done yet!
Step 5: Get a Little Bling with It. * Snap * First I tested the Tulip beads in a bottle on my file folder to get used to the product.
Then I added my liquid bling to the bag! I have to admit, it was kind of hard to stop, but I did restrain myself. However, I see much more crafting with this in the future! (Note: Because of where I added the Beads in a Bottle to the bag, I was able to have the tote bag lie flat, even though I had already gathered the bottom. In the future, I might add the Beads in a Bottle before gathering the bottom.)
I let the Beads in a Bottle dry for a few hours before proceeding.
Step 6: Gather the Top. This is where I started to get a little wiser. I realized that these Crochet Dude Bent End Needles were actually made to poke through fabric like this at 1/2 inch intervals. DOH! I could have used that in step 2! Therefore, using black cotton Bonbons on the pointy needle, I simply stitched around the border of the top hem of the bag. I started at one seam and ended at the same seam. I secured the gather with a strong knot, making sure not to gather the top too tight! This will be my only opening on the tote!
Step 7: Crochet the Top. Using the chain and single crochet method described in step three, I crocheted a sweet border around the top of the bag. I did not go further and do the double crochet round.
Step 8: Crochet Optional Flower & Pin to Bag. I just did a regular/kind of improvised flower, but any handmade flower, crocheted or not, will work beautifully! I just used a simple safety pin to attach the flower, but you could stitch it to the bag, or even stitch a pin onto the back of the flower.
Click here to see if a Michaels store in your area is carrying the Crafty Chica line.
 |
| Que milagro. I'm done! |
 |
| Yes, I am wearing green jeggings. But in my defense, I was indoors. |
I hope this project tutorial inspires you to decorate your own Crafty Chica Market Tote! Please leave any questions here in the comments, so I can answer back here and we can all benefit from one another's suggestions and questions! If you make a project like this, please share it on the Art, Like Bread Facebook page! Thanks so much!


